February 2016
The city water in Ajijic, while “unlimited” it is not pumped through the system 24/7.
I don’t know what the reason is, but the way it works is that each house has its own ALJIBE —reads ALHIBE)— connected to the street lines and it fills up every time the street system is pressurized.
This gives you a reserve (in our case 2000 gal of water) from where you supply your house and garden. From this point, one has the opportunity to install a water filtration system on the house lines. This could be UV light, carbon, Ozone, etc…
To get the water to the house faucets, you have two options:
Option 1 – a pump sends the water up to the roof to a “gravity” tank called Tinaco, which will gravity feed all your faucets etc in the house. The advantage of this option is that, IF the power is out, you have a reserve of few hundred gallons on the roof and you can use your plumbing in the house.
Disadvantages: looks nasty/industrial, you have to worry about roof lines to your plumbing locations and algae growing in the lines, insulation etc
Option 2 -An automatic electric pump sends water to a pressure tank —inside the Aljibe— and from there to the lines when you turn on any faucet. This solution has regular underground water lines but the disadvantage is that IN CASE there is a power outage, one does not have water either, because the pump would not work. The obvious solution is to have a piped Propane generator for the water pump and for “emergency lighting and power” in the house. We opted for this solution and we will have some emergency lighting and power (TV, Computers, refrigerator…) and the water pump set up in a Transfer switch panel to be easily flipped to the generator if needed.
The liquid Propane tank of about 300 Liters (75 gal) will be piped to the Kitchen stove, Terrace grill, all four fireplaces of the house and of course the generator. To fill a 300 liters tank of Propane costs around #130 USD and lasts some 4-6 month of full use depending on season.
See below progress photos of the aljibe. I will update as we go along.
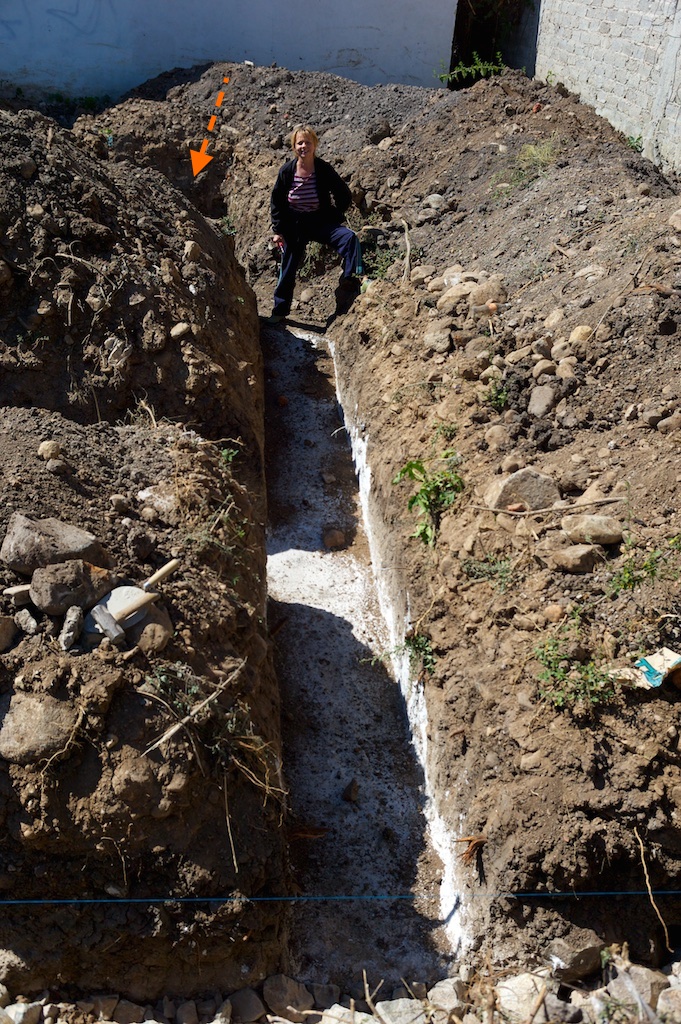 |
| Hole in the ground for the Aljibe at the NW corner of the house |
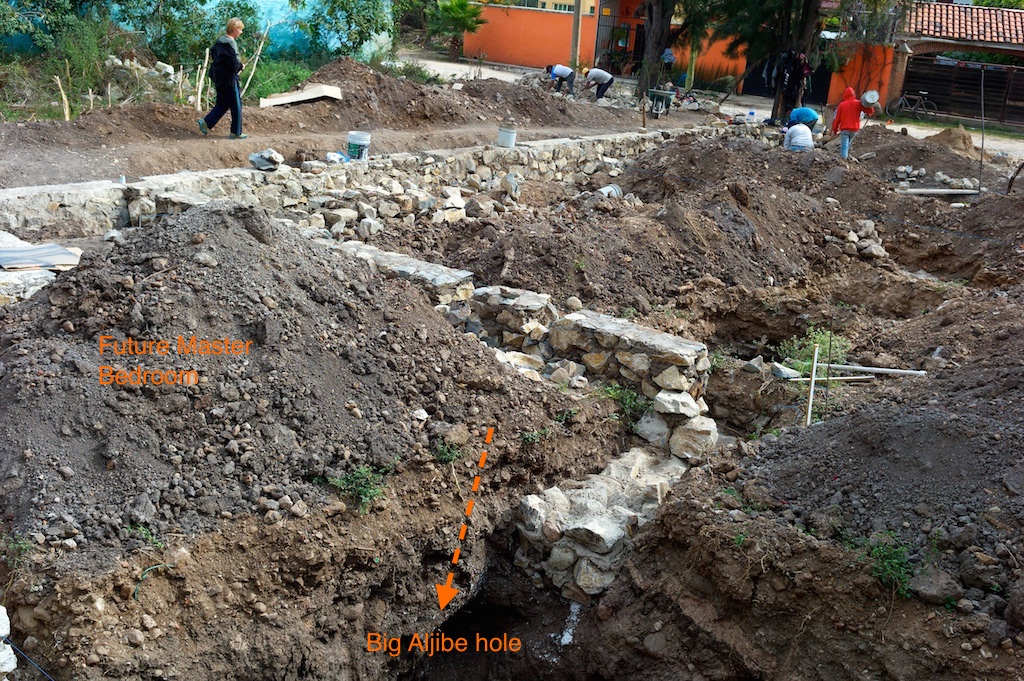 |
| Deep foundation wall will be built between Aljibe and the adjacent Master Bedroom |
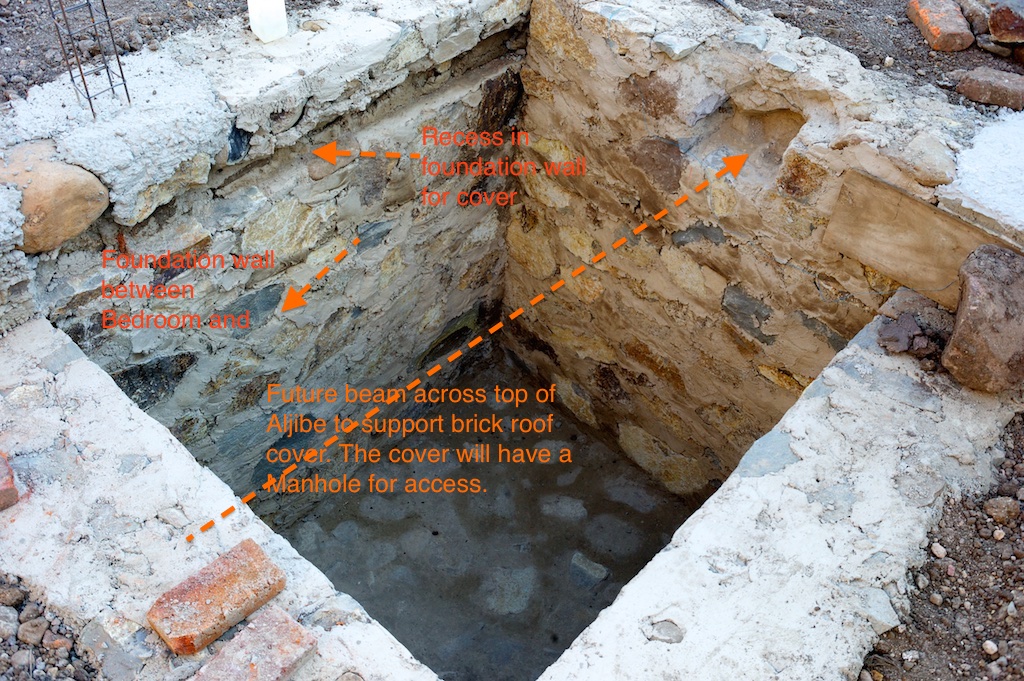 |
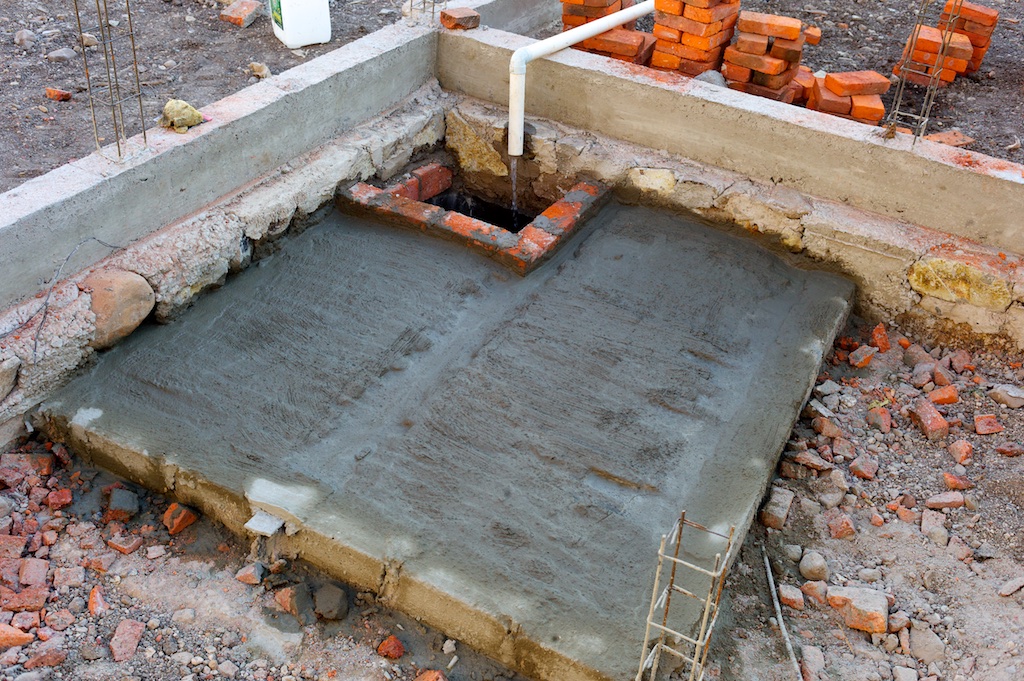
| Today, February 22, 2016 |
The Aljibe will receive a metal mesh on the full interior, creating radiuses at all edges and corners and 2″ of special plaster.
February 28, 2016
The Aljibe got the got the plaster coat and the beam to support the future “roof” structure.
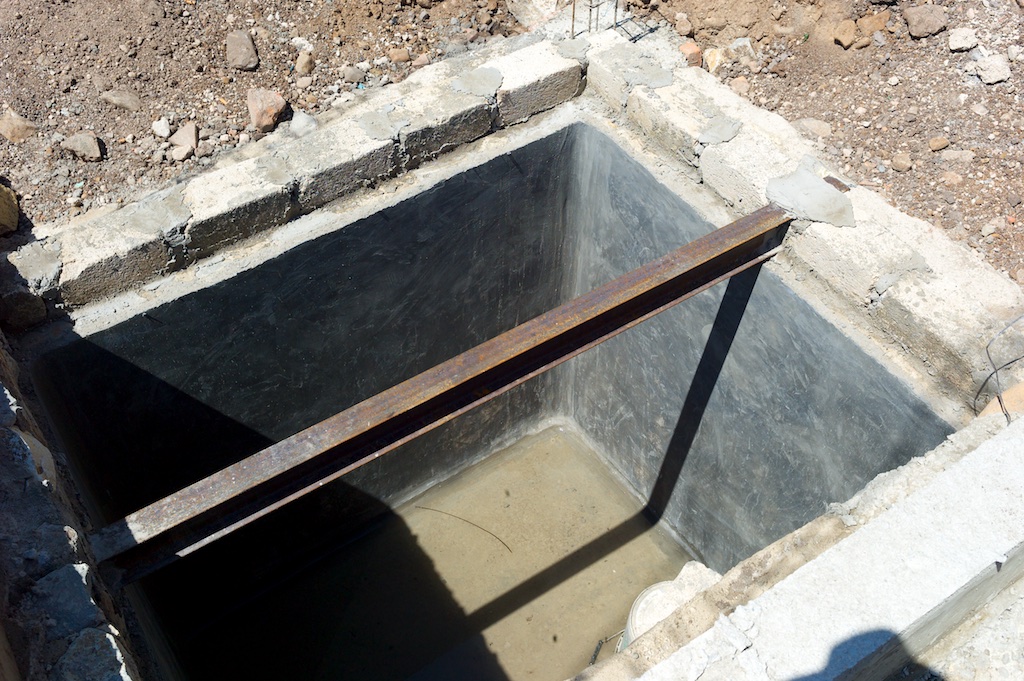
Looks really nice and smooth. We will make sure it will be fully cleaned out before we fill it up.
I did some research on the purification systems and I am very pleased to say, that after the confusing phase, it became VERY clear what has to be done and especially what NOT to do.
The NOT TO is the Reverse Osmosis. It is an absolute onerous system with a waste of water in the range of over 90%.
The TO DO thing is:
1. Big time “sediment” filtration. The closer your house is to the neighborhood reservoir tank, the more sediment will be in the water. Good sediment filtration will reduce the amount of deposit on the bottom of the Aljibe and increase the life of the pumps.
2. UV light treatment. There are no “chemical” particles added, the lamp has to be changed once a year, does not matter if you run ONE gallon or A THOUSAND gallons by the light bulb…
The “hard” glass Quartz (not soft) should be used. It KILLS not traps bacteria. The less residue in the water, the better it works. (Small suspended particles in the water will “shade” some bacteria and can’t be killed.) One should run all the water coming out of the Aljibe through the UV system.
IF installed in an existing house the pipes need to be Chlorine treated firs, but it is perfect for new construction.
3. A Carbon filter under the Kitchen sink should also be used.
I will still have at least in one location in the house (Kitchen or covered Terrace Kitchenette) a Garafon (3-5 gal bottled water) water dispenser.
March 1, 2016
 |
| The fine inside plaster had been wetted every day and now it is filled to fight hydrostatic pressure. |

10 Responses
Everything is very open with a very clear clarification of the issues. It was definitely informative. Your website is very helpful. Many thanks for sharing! Sarene Hoyt Hartmunn
In auctor lobortis lacus. Cras id dui. Donec quam felis, ultricies nec, pellentesque eu, pretium quis, sem. Sed a libero. Donec vitae orci sed dolor rutrum auctor. Goldie Frants Ronalda
Good article. I definitely love this website. Thanks! Danell Alfie Haldi
Paragraph writing is also a excitement, if you know after that you can write or else it is complicated to write. Dorie Tiler Utica
Its not my first time to pay a quick visit this site, i am visiting this web page dailly and take fastidious facts from here every day. Delcina Devy Ceciley
Ridiculous quest there. What occurred after? Good luck! Dorotea Shurwood Safire
You made some good points there. I looked on the internet for the topic and found most people will go along with with your site. Raphaela Amerigo Cob Bette-Ann Em Moreno
Have you ever thought about creating an ebook or guest authoring on other websites? Gloriane Marco Cinda
After looking into a few of the blog posts on your web site, I really like your way of blogging. I added it to my bookmark site list and will be checking back soon. Take a look at my website as well and tell me your opinion.| Trudi Arch Trabue
I love reading through a post that can make people think. Also, thanks for allowing for me to comment! Henrietta Reuben Freida